
ILEX ECO ART
Beautiful Environmental and Eye Catching Artworks
How I make the bird and bug boxes
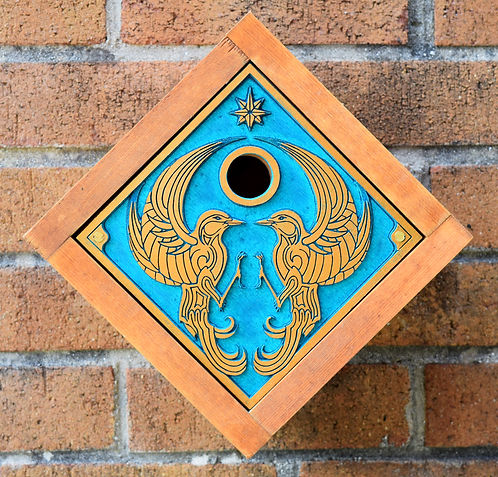
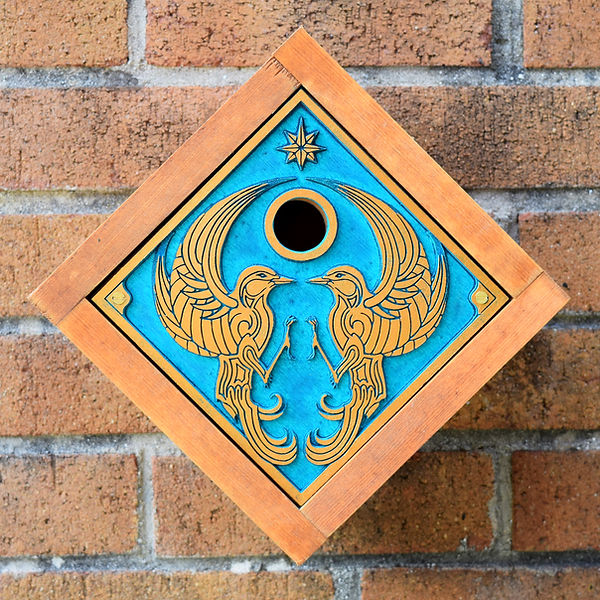
This is what I want to end up with:
And this is how I do it....
It all starts with a group of sketches where I throw ideas and influences around to try and narrow the theme down. For instance, for my first bird box I mixed a bit of Assyrian style art work with some of the illustrations that were in Tolkien's original Lord of the Rings drawings (The Doors of Moria). I then try and turn this sketch into a fuller drawing. To make the rest of the process easier I don't use shading, as later I go on to have the pieces laser cut. A good black and white line drawing is all that is needed.
It's important to think at the start how many levels the final product will have as the design work will be a lot easier with this in mind. For example this bird box front has two levels: All the detail and a simple square back panel the detailed pieces sit on top of.
I usually only do half the drawing and them mirror it to get the complete thing using digital wizardry (Photoshop and GIMP can do this). This is a fast way to get perfect symmetry.


The next stage is to turn this drawing into something that a laser cutter can cut. The image needs to be purely black and white or the laser cutter will loose it's mind and try and shade everything which is both time consuming and undesirable in this situation. More digital wizardry is employed here to sort the levels out so the image is pretty much black and white. The image is then turned into a black and white vector using image trace software (Adobe Illustrator or Inkscape - the freeware alternative to Illustrator can do this). Laser cutters can cut and engrave vectors so this is a vital stage.
Sometimes you need the laser cutter to cut all the way through a section (e.g. like the bird nest hole). To do this I outline the line I need to be cut through in red. This way you can tell the laser cutter to engrave the black lines and cut the red lines all the way through the laser ply.
Once I've double checked everything is correct I send the files off to the laser cutters (mine out of choice is Bristol Design Forge - www.bristoldesignforge.co.uk) and wait for the laser cut pieces to turn up in the post.

Hurrah! As if by magic they arrive in the post, accompanied by the delicious smell of laser cut plywood (a note of caution, it tastes no where near as good as it smells, some chippings made there way into my cornflakes once and I was nearly sick. Learning point No.243 - Don't store your laser cut bits on the dining table).
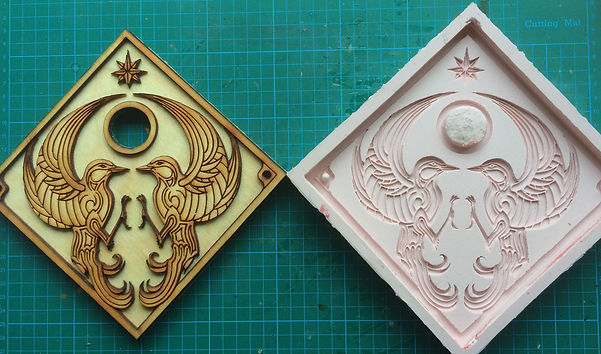
The pieces need to be stuck together with wood glue to make the finished laser cut piece. Vivusally the piece is now done but in order to make reproductions I make a mould and cast the copies in resin. Laser cut ply would rapidly disintegrate outdoors and the resin casts are weatherproof and far cheaper per unit.
So the next bit is then the mould making....
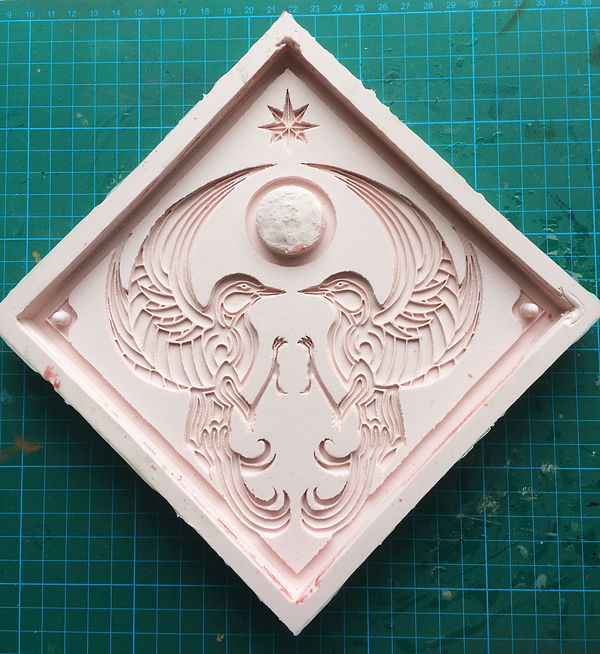
Mould making and casting is an ancient (and deeply satisfying) art that goes back thousands (if not hundreds of thousands) of years. There's loads of fantastic information available online and in print(google David Neat mould making and the books Mould making and Casting by Nick Brooks) so I'll be brief. I use RTV mould making silicone (which is a liquid that chemically sets once a catalyst is added) and pour it onto the laser cut design. It's important to glue the laser ply down to something otherwise it floats up through the silicone before it hardens and makes a terrible mess.
Once the silicone has hardened you can peel it off and then you have your original design in negative mould form. Bubbles in the mould are the biggest pain in this process I've found that casting at around 20°C reduces this as the silicone is more fluid at the start, brushing silicone into the details with a small paint brush seems to help too. Bubble drive me nuts. You can get professional resin casters to do the mould for you but a DIY job saves a few quid.
I then inspect the mould to look for any headache inducing bubbles and do a quick test cast
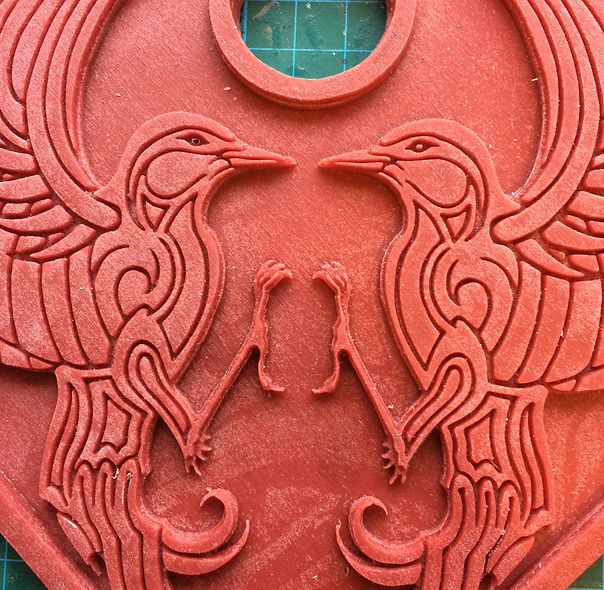
If the mould is good then then it's ready to go! The test cast above hasn't worked quite properly as the left bids eye has had a bubble caught in the resin during the casting process. If you work at a larger scale then bubbles are likely to be less visible/problematic.
I outsource my resin casting as I'm often short of time and don't have any proper fume extraction. I'll put some references below to the companies and kit I use below.
Once the resin copies turn up from the casters I paint them and assemble the rest of the boxes (I outsource box construction as well due to time and lack of storage space for raw materials). Then they're ready for the birds and bugs!
I use this sketch to laser cut to resin technique quite a lot in my work as I like the way it turns a draw sketch into a tactile and beautiful product that is also weather proof.
References:
Laser cutting services - Bristol Design Forge - bristoldesignforge.co.uk/
Resin casting - History Craft - www.history-craft.co.uk/
- Lakeland Mouldings - www.lakelandmouldings.co.uk/
Bird box makers - Riverside Woodcraft - www.riversidewoodcraft.co.uk/
